

Learn how to clean a Cricut mat and make it sticky again with this helpful article full of useful tips and tricks.
Cleaning your mat can save you a little money, or at least save you a trip to the store!
When your Cricut cutting mat gets dirty and loses its stickiness, you might start to wonder: Should you clean the mat? Try to restick it? Or just toss it in the trash and buy a new one?
If your mat starts to lose its “oomph,” don’t fret. You don’t have to throw away old dirty cutting mats! I’ll show you how to refresh Cricut mats with a little cleaning, instead.
In this post, I’ll share my best tricks and tips for cleaning Cricut cutting mats and making them sticky again.
New to Cricut? You may want to read this first: What is a Cricut Machine, and What Can it Do?
Not sure which Cricut machine is right for you? Check out this detailed Cricut Comparison Guide.
How to Clean Cricut Cutting Mats
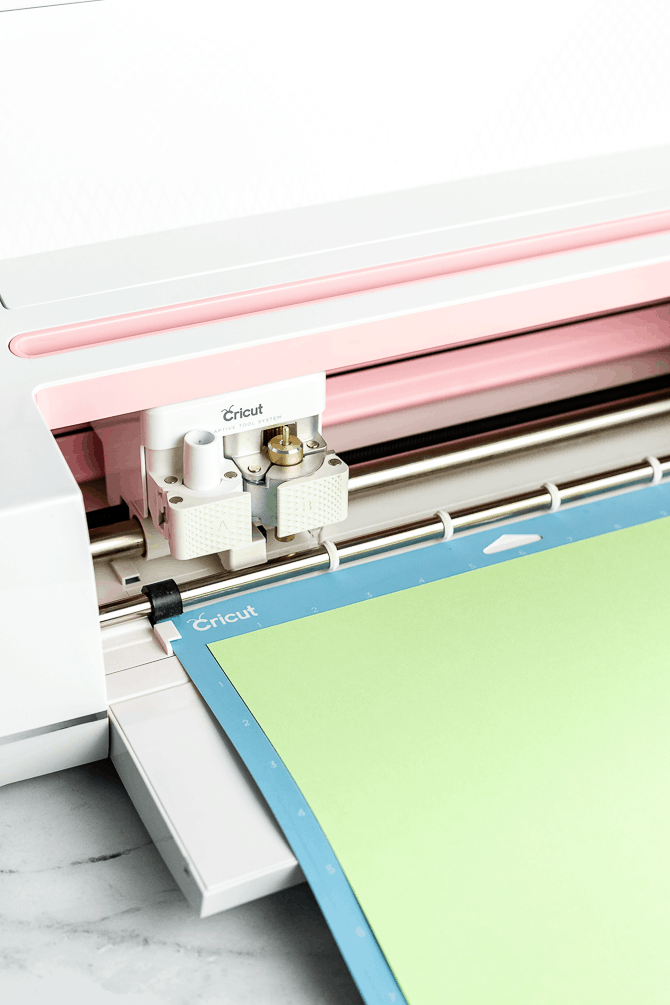
Cricut mats are the sticky cutting mats that hold materials as they go through the Cricut cutting machine. There are four types of Cricut cutting mats, each with a different level of adhesive. In general, a Cricut cutting mat should last for 40-50 uses before it starts to wear out.
You read that right; the cutting mats do not last forever. They will start to wear out and lose their stickiness over time. However, you can extend the life of your mat by cleaning it when it gets dirty and protecting it between uses.
How often should you clean your Cricut mat?
If you craft with your Cricut mats every day, you’ll need to clean your mats more often than someone who crafts once a week.
Most Cricut mats will need cleaning after 2-4 cuts, depending on the types of materials you use.
I recommend cleaning the mat whenever you notice that the materials don’t stick as well as they used to.
You may need to clean the mats more often if you use materials that leave a lot of debris, like felt, denim, glitter vinyl, or leather. You’ll especially want to clean the mats after you cut wood material with the knife blade.
But, if you stick to smooth materials like vinyl and cardstock, you can probably get away with fewer cleanings.
How to Keep the Mats Clean
The best way to extend the life of your cutting mats is to keep them clean in the first place.
Here are some of the easiest ways to keep the mats clean.
- Clean the mats regularly with a lint roller or scraper. If you don’t have a Cricut scraper tool, you can use an old credit card or plastic gift card to remove scraps from your cutting mat. Simply run the edge of the card across the surface of the mat to release scrap pieces.
- Always replace the plastic protector sheet. Cricut mats come with a clear protective sheet. You can keep your mat cleaner by covering the mat with the protective sheet in between projects. And, if the plastic sheet ever gets dirty, you can wipe it off with a baby wipe or a little squirt of Windex on a paper towel.
- Use the right mat for the right material. Use the LightGrip mat for delicate papers, the FabricGrip mat for fabric, and the StrongGrip mat for heavy-duty materials.
What can you use to clean a Cricut mat?
Here are some of the most common items you can use to clean Cricut mats. These are inexpensive and easy to fine – you might already have them at home!
Remember that you may not need all of these supplies, depending on which cleaning method you choose.
Supplies and Tools
- plastic Cricut scraper tool
- lint roller
- alcohol-free baby wipes
- Dawn dish soap
- dish brush
- LA’s Awesome cleaning spray
Different Cleaning Methods for Different Mats
It’s essential to choose the right cleaning method for your specific mat.
In the list below, I describe several “light duty” methods, “medium-duty” methods, and “heavy duty-methods”. Start with the gentlest method, and make your way down the list.
Note: The cleaning methods in the list below will work well for the blue LightGrip mat, the Green StandardGrip mat, and the purple StrongGrip mat — but not the pink FabricGrip mat.
The pink FabricGrip mat, on the other hand, has a special type of adhesive that requires different cleaning methods. Scroll down for a special section on how to clean the pink Cricut mat.
Light-Duty Cleaning Methods
You can use the light-duty cleaning methods after every project to maintain the mat.
1. Scraper tool
Use the plastic Cricut scraper tool to scrape off large pieces of leftover material or debris. (I like the XL scraper for this job.) Gently pull the edge of the scraper tool over the surface of the cutting mat. The tool should dislodge any small pieces of excess material, stray hair, or fuzz.
2. Lint roller
You can use a lint roller to remove small pieces of leftover material that remains stuck to the mat. Roll it over the surface of the mat to pick up small paper pieces, glitter, or fuzzies.
3. Baby wipes
Baby wipes are a cheap and easy way to clean Cricut mats. I usually keep a bag of wipes in my craft area to clean up spills and messes anyway — so they’re a convenient item to have around.
How to Clean a Cricut Mat with Baby Wipes
You can use baby wipes to gently wipe the surface of the mat without damaging the adhesive. Choose alcohol-free baby wipes for the best results.
To clean a mat with wipes, simply wipe the mat in a circular motion until you have cleaned the entire surface. If the mat is really dirty, you may need to use 2 or 3 wipes. Use gentle pressure, and be careful not to scratch the adhesive off. Let the mat air dry completely before using it.
Let the Mat Air Dry Completely
Whichever method you choose, remember to let the mat air dry. Place the mat on a drying rack or hang it up vertically. Don’t use heat, which can damage the mat. And don’t wipe it with a towel, which would cover the sticky surface with even more fuzz and lint – just what you’re trying to get rid of!
Medium-Duty Cleaning Methods
If none of those gentler methods work to clean the mat, try washing it with soap and water.
How to Clean A Cricut Mat with Dish Soap
You can clean a Cricut mat with dish soap and warm water. Choose a mild dish soap like blue Dawn for best results. (Don’t use hand soap with lotion or oils.)
- First, use the scraper tool to remove excess material from the mat.
- Then, lay the mat on a flat waterproof surface, like a kitchen counter. Using a clean dishcloth or a soft dish brush, gently scrub the surface of the mat in a circular with soap and warm water.
- Let the air mat dry completely before using.
Heavy-Duty Cleaning Methods
If your mat is very dirty or greasy, you may need to use stronger cleaning methods. One of the most popular cleaning sprays that people use to clean their Cricut mats is LA’s Totally Awesome spray. You can find this spray at most dollar stores or online.
How to Clean a Cricut Mat with Awesome Spray
Before you try this method, be aware that it gets mixed reviews online. Some people swear by it, while some people say it removed all stickiness from their mat. (Personally, I’ve only ever needed to use dish soap and warm water, so I would be careful!)
Here is how to clean your Cricut mat with Awesome Spray:
- Spray the mat with cleaning spray.
- Let the mat sit for 5-10 minutes.
- Use a squeegee or scraper tool to scrape the residue off the surface of the mat gently. The keyword here is “gently“. Use very light pressure, so you don’t damage the mat.
- Rinse the mat with warm water. Lay flat or hang vertically to dry.
How to Clean the Pink Cricut Fabric Mat
The pink FabricGrip mat is made for cutting fabric. It has a special adhesive that is different from the adhesive on the other three mats.
The pink mat’s adhesive is quite delicate, so try not to scrape it or scratch it. If you must, you can use the tweezer tool to remove larger pieces of leftover material.
You wouldn’t want to use Awesome spray or other harsh cleaning sprays on the pink mat.
How to Clean Felt off of a Cricut Mat
One of the hardest materials to clean off of a Cricut mat is felt. It’s fuzzy texture since it leaves a lot of lint and debris on the mat – even if you do everything right.
My number one tip for cutting felt is to use an older pink or green StandardGrip mat that you don’t mind getting dirty. Set it aside for your felt projects, and don’t worry about it.
You can also try backing the sheet of felt with freezer paper, and sticking the paper side down onto the mat. This will hold the felt in place while the Circut cuts, and protect the Cricut mat from lint and fuzz. After you finish making the cuts, you can peel the freezer paper off like it was never there..
How to Make a Cricut Mat Sticky Again?
Sometimes, all you need to do is clean your mat to make it sticky again.
But, if your mat is older or more damaged, cleaning may not do the trick by itself.
If cleaning doesn’t make your mat sticky again, you may need to try other ways of resticking a Cricut mat.
Important: Before we keep going, you should know that resticking your Cricut mats may void the Cricut machine’s warranty. When you add glue to your mat, you run the risk of jamming up the machine with excess adhesive. So, please proceed with caution!
Now, if resticking the mat seems like more trouble than it’s worth, you can always buy a new mat! Some of these cutting mat multipacks can be surprisingly affordable.
Here are the basic steps to restick a Cricut mat:
- Clean the mat. Remove dirt, debris, or other leftover materials with the scraper tool. Then, clean the mat with baby wipes or soap and water.
- Once the mat is clean, tape off the edges to prepare the mat for applying the new adhesive. Use masking tape or blue painter’s tape to protect the outer border (where the rollers touch the cutting mat).
- Apply the new adhesive. Many people recommend using Spray n Bond Basting Adhesive, which is a temporary repositionable adhesive material. Following the directions on the back of the can, spray the adhesive on the mat.
- Let the adhesive dry for 10-15 minutes.
Other adhesives people have tried include Loctite and Krylon brand repositionable adhesive, Tacky Glue, Zig Adhesive, and Aleene’s Tack It Over and Over.
If you have a tried and true method of resticking a Cricut mat, please leave it in the comments. We’d love to test it!
More Cricut Ideas
If you like Cricut crafts, you may be interested in these related posts.
- What is a Cricut Machine, and What Can it Do?
- How to Make Stickers with Cricut “Print then Cut”
- How to Make a Monogram in Cricut Design Space
What’s Next?
Pin this post: Save this tutorial to your Pinterest boards so that you can come back to it later.
Leave a comment: We love to hear your feedback. Tell me in the comments below!
Share on Instagram or Facebook: When you make this project, share it on social media and tag me @sarahmaker_. We love to see what you make!
Have questions? Join the Facebook Group!
We hope this article was useful for you! If you have any additional questions, feel free to join my Facebook Group. We created this group for you to share pictures, ask questions, and help each other out.


How to Clean a Cricut Mat
How to clean a Cricut mat and make it sticky again. Refresh your old dirty Cricut cutting mats with these easy cleaning tips.
Materials
- alcohol-free baby wipes
- gentle dish soap
Tools
- Cricut Scraper tool
- dish brush
Instructions
- Use the plastic Cricut scraper tool to scrape off larger pieces of leftover material or debris. Gently run the edge of the scraper tool over the surface of the cutting mat to dislodge any stray materials.
- Roll a lint roller over the surface of the mat to pick up small paper pieces, glitter, or fuzzies.
- Use baby wipes to wipe the mat in a circular motion until you have cleaned the entire surface. If the mat is really dirty, you may need to use 2 or 3 wipes. Use gentle pressure, and be careful not to scratch the adhesive off.
- Using a clean dishcloth or a soft dish brush, gently scrub the surface of the mat in a circular with soap and warm water.
Start with the gentlest method, and use move down the list as needed until the mat is clean.
With all methods, let the mat air dry completely before using it.
Notes
See more cleaning methods in the post.


Similar Posts
How to Connect Cursive Letters in Cricut Design Space
How to Upload Fonts to Cricut Design Space in 4 Easy Steps
How to Upload Images to Cricut Design Space in 4 Easy Steps
How to Make Reverse Canvas Wall Art with Cricut
An Even Easier Way to Make Monograms with Your Cricut
DIY Halloween Trick or Treat Bags with Cricut