

Learn everything you need to know about Cricut cutting mats with this comprehensive beginner’s guide. We’ll cover all the basics about Cricut mats, including the different sizes, colors, and strengths.
By the end of this guide, you’ll better understand how to use Cricut machine mats, and know which mat to use with which material.

Whether you’re a Cricut beginner or a Cricut pro, you know how important it is to have the right cutting mat for your project. But what are all the different types of mats, and which one do you need for your specific materials?
If you’re ready to learn more about Cricut cutting mats, you’re in the right place. This beginner’s guide to Cricut mats will teach you everything you need to know to get started – how they work, what types there are, which ones are right for you – as well as other useful tips and tricks like taking care of your mat so that it lasts longer and doesn’t warp over time from use.
This article will cover common questions about Cricut mats, such as:
- What is a Cricut mat?
- When do you use a Cricut mat?
- What are all the types of Cricut mats?
- Which mat do you use for which materials?
Keep reading to the end, where I’ll give you some tips about how to keep your mats sticky for longer, and how to clean and “restick” mats that get dirty.
New to Cricut? You may want to read this first: What is a Cricut Machine, and What Can it Do?
Not sure which Cricut machine is right for you? Check out this detailed Cricut Comparison Guide.
What are Cricut Mats?
First things first, let’s talk about what a Cricut mat is, and when you’d want to use one.
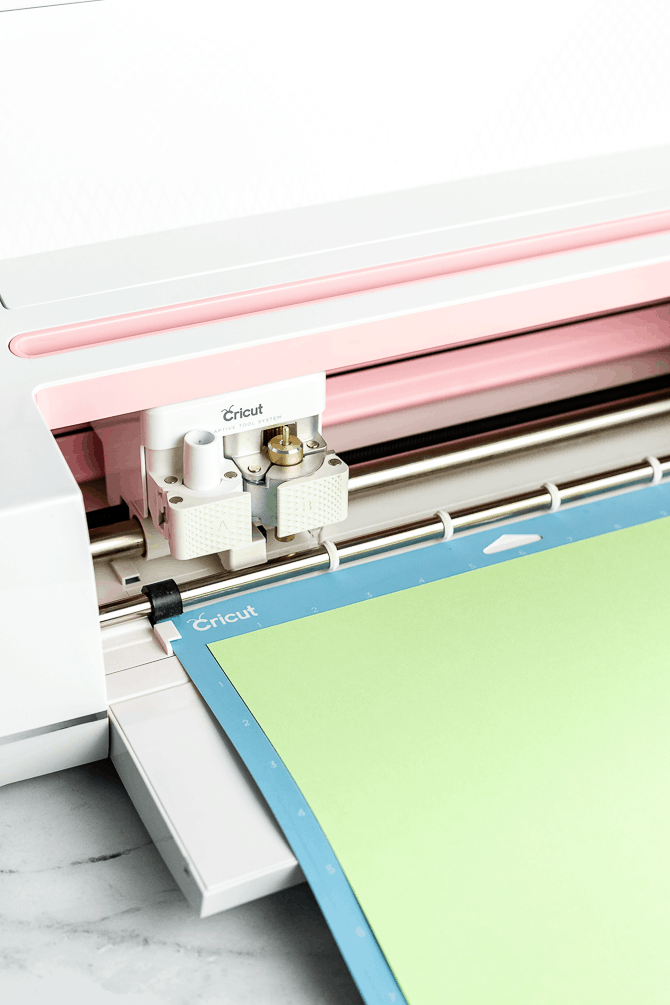
A Cricut mat is a flexible, reusable cutting mat that you can use with your Cricut machine to cut projects.
Each mat has an adhesive area that holds your material in place during cutting. And when the cut is complete, it’s easy to remove the cut material from the mat and store it away for your next project.
Cricut cutting mats are available in several sizes and grip strengths (or stickiness levels), so you can always find the perfect mat for your particular material and project design.

Types of Cricut Mats
When shopping for Cricut mats, you’ve probably noticed that they come in a variety of colors and sizes. It can be a little tricky to know which mat your should use for your particular machine and material – so let’s break down the differences.
4 Mat Colors
Cricut cutting mats are available in four different grip strengths, each type designated by its own color. Each of the four mats has a different amount of “grip” designed to work perfectly with a different category of materials.
LightGrip mat – Blue
The blue LightGrip mat has a gentle adhesive that’s designed to work well with lightweight materials. I recommend using the LightGrip mat for standard paper, scrapbook paper, light cardstock, vellum, sticker paper, and even thin vinyl.
The LightGrip mat is my go-to mat for cutting paper since it so easily releases the paper once the cut is complete.
StandardGrip mat – Green
The green StandardGrip mat has a medium-strength adhesive that’s designed for materials like medium-weight and heavy cardstock, adhesive vinyl, iron-on vinyl (HTV), and stencil vinyl.
You can also use the StandardGrip mat to cut bonded fabric, faux leather, and suede.
I find myself reaching for the StandardGrip mat to cut adhesive vinyl and iron-on (heat-transfer vinyl) projects. The adhesive might be a little stronger than I’d prefer for the first few cuts, but after I break it in, the grip level is just right.
The great thing about the green mats is that they have a long-lasting adhesive, and they’re usually the cheapest, too. If you’re unsure which mat to use for your project, I recommend starting with the green mat.
StrongGrip mat – Purple
The purple StrongGrip mat has the strongest level of adhesive designed to be used with heavyweight materials like glitter cardstock, chipboard, poster board, magnet sheets, balsa wood, and leather.
The adhesive on the purple mat is really strong, so it’s perfect for materials that tend to shift around while being cut. For instance, you’ll want to use the purple mat anytime you’re cutting thick materials on your Cricut Maker using the Knife Blade.
That said, be careful – the adhesive is so tacky that it can tear lightweight materials. Just go slow and use your spatula tool, and you’ll be fine.
FabricGrip mat – Pink
The pink FabricGrip mat is a newer mat with a special adhesive designed for fabric. It’s perfect to use with the Cricut Maker and the rotary blade to cut unbounded fabric for quilting or sewing projects.
The Pink mat has a different adhesive than the other three mats – so you’ll need to treat it a little differently when it comes to cleaning the mat. We’ll talk about how to clean the mats in a later section.
Cricut Mat Sizes
The Cricut mats come in a variety of sizes to fit the different Cricut machine models.
The Cricut Maker series and the Cricut Explore series machines are compatible with two sizes of cutting mats:
- 12″ x 12″ mat, with a maximum cut area of 11.5″ x 11.5″
- 12″ x 24″ mat, with a maximum cut area of 11.5″ x 23.5″
The Cricut Joy is compatible with two sizes of cutting mats, as well:
- 4.5″ x 6.5″ mat, with a maximum cut area of 4″ x 6″
- 4.5″ x 12″ mat, with a maximum cut area of 4″ x 11.5″
The Cricut Joy also uses a special Cricut Joy Card Mat, which you can use to make folded greeting cards. We’ll talk about the card mat in the next section.

Special Mats – Card Mat
There’s one more mat that is unique to the Cricut Joy model. It’s called the Cricut Joy Card Mat, and it’s perfect for cutting the front of folded greeting cards.
You can use the Card Mat with the special Joy card inserts, or your own folded cardstock.
Which Cricut mat should I use?
This is the question on everyone’s mind: “What color mat do I need for my project?”
Here is a list of the right mat to use for the most common materials.
- Best Cricut mat to use for paper or light cardstock: Blue LightGrip mat
- Best Cricut mats to use for cardstock: Blue LightGrip mat or green StandardGrip mat
- Best Cricut mat to use for glitter cardstock: Purple StrongGrip mat
- Best Cricut mat to use for vinyl: Green StandardGrip mat
- Best Cricut mat to use for iron-on: Green StandardGrip mat
Here is a list of materials that you can cut with each of the 4 Cricut cutting mats.

Blue LightGrip Mat
Use the blue mats with your Cricut Maker, Cricut Explore, and Cricut Joy machines to cut a variety of lightweight materials:
- Printer paper
- Light cardstock
- Vellum
- Construction paper
- Vinyl

Green StandardGrip Mat
Use the green mats with your Cricut Maker, Cricut Explore, and Cricut Joy machines to cut a wide range of medium-weight materials.
- Medium and Heavy Cardstock
- Embossed or Textured Cardstock
- Iron-on Vinyl
- Adhesive Vinyl
- Stencil Film
- Bonded Fabric
- Faux Leather

Purple StrongGrip Mat
Use the purple mats with your Cricut Maker and Cricut Explore series machine to cut thick or heavyweight materials.
- Glitter cardstock
- Magnet sheets
- Chipboard
- Posterboard
- Stiffened fabric
- Leather
- Balsa wood and Basswood

Pink FabricGrip mat
Use the pink mats with your Cricut Maker or Cricut Explore series machine and Rotary Blade or Bonded-Fabric Blade. Cut any fabric, including:
- quilting cotton
- cotton canvas
- denim
- knit
- felt
- flannel
- and many more.
What if my mat is TOO sticky?
Have you ever felt like your new Cricut mat was too sticky? I know what you mean. Sometimes it’s hard to get delicate materials to release from a brand new mat.
If that’s the case, you can condition the mat and make it a little less sticky. Take a clean t-shirt and tap it all over the surface of the mat. A few fibers from the t-shirt will stick to the adhesive, and reduce the stickiness level just enough to make it easier to remove materials from the mat.
Cutting Without a Mat
Did you know that the newest Cricut machine models can cut without a mat? It’s true!
The Cricut Maker 3, Explore 3, and Joy are all compatible with Cricut brand Smart Materials which can be cut without a mat.
Just to clear up some possible confusion – you can still use mats with the Maker 3 and Explore 3 if you want to. You just have the option to go matless with the Smart Materials, too.
How to Store Cricut Mats
The best way to extend the life of your cutting mats is to store them properly.
Remember how all mats come with a clear plastic cover sheet? Always replace the cover sheet when you’re done using the mats. Store the mats with the cover sheet on to protect them from any dust or lint that might be hanging around your craft table.
This will keep your mats clean and sticky for longer.
How long do Cricut mats last?
Unfortunately, Cricut cutting mats do not last forever. They will start to wear out and lose their stickiness over time.
In general, a Cricut cutting mat should last for 40-50 uses before it starts to wear out.
However, you can extend the life of your mat by cleaning it when it gets dirty and protecting it between uses.
How to Clean Cricut Mats
If you notice that your materials aren’t sticking as well as they used to, it might be time to clean your cutting mats.
Here are some of the easiest ways to clean Cricut cutting mats.
- Remove leftover material with a lint roller. Use a fresh lint roller sheet, and gently roll the top of the mat to pick up any small bits of material left over from your latest project.
- Clean the mat with a plastic scraper tool. Use a Cricut scraper tool or an old plastic gift card to remove fuzz and bits of material from your cutting mat. Simply run the edge of the card across the surface of the mat to release scrap pieces.
- Wipe with alcohol-free baby wipes. Gently wipe the surface of the mat with 1 or 2 wipes until you have cleaned the entire surface. Let the mat air dry completely before using it again.
- Wash with lukewarm water and a drop of gentle dish soap. Let the mat air dry completely before using.
For a lot more information about cleaning Cricut mats, read this article: How to Clean a Cricut Mat and Make it Sticky Again
How to Clean the Pink FabricGrip Mat
The pink mat’s adhesive is different and more delicate, so you’ll have to treat it more gently. Most importantly, you can’t use a scraper tool on the pink mat, or you’ll scrape up the adhesive itself.
Instead, use tweezers or the spatula tool to remove as much of the leftover fabric as you can.
And try not to worry if you can’t remove every last thread from the pink mat – it will work just as well, even if there’s still a little leftover fabric or fuzz that you can’t remove.
How to Make Your Cricut Mats Sticky Again
The best way to keep your mats sticky is to protect them with the clear cover sheets, and keep them as clean as possible. The next best way is to clean them with the scraper tool or a wet wipe or a gentle baby wipe.
But if you try those methods and still wish your mat was stickier, you can try applying new adhesive. Some people have seen success with basting adhesive, tacky glue, or other repositionable glue sprays.
Important: I need to warn you that applying adhesive spray to your mats may void the Cricut machine’s warranty. When you add glue to your mat, you run the risk of jamming up the machine with excess adhesive. So, please proceed with caution!
If you’re like me and think resticking the mat seems like more trouble than it’s worth, you can always buy a new mat!
When To Get a New Mat
If your mat is damaged, torn, or lost all of its adhesive strength, it’s time to get a new mat. Some of these cutting mat multipacks can be surprisingly affordable – or at least cheaper than wasting a bunch of fancy vinyl on a mat that doesn’t work anymore.
More Cricut Guides and Tutorials
For more information about the Cricut tools you really need, read my Ultimate Guide to Cricut Tools and Accessories.
Then, learn more about your Cricut machine with these related Cricut articles.
- How to Cut Paper and Cardstock on Cricut
- How to Cut Vinyl with Cricut: A Step by Step Guide for Beginners
- How To Use Cricut Iron-On Vinyl
- Ultimate Guide to Cricut Blades for Beginners
Have questions? Join the Facebook Group!
We hope this article was useful for you! If you have any additional questions, feel free to join my Facebook Group. We created this group for you to share pictures, ask questions, and help each other out.

I hope this article was useful for you! If you have any additional questions, feel free to join my Facebook Group for Cricut Crafts.
Join the group to share pictures, ask questions, and help each other out.
What’s Next?
Pin this post: Save this tutorial to your Pinterest boards so that you can come back to it later.
Leave a comment: We love to hear your feedback. Tell me in the comments below!
Share on Instagram or Facebook: When you make this project, share it on social media and tag me @sarahmaker_. We love to see what you make!


Similar Posts
What is a Cricut Machine, and What Can it Do?
How to Make a Stencil with Cricut
How to Use Flatten in Cricut Design Space
How to Make a Monogram in Cricut Design Space
DIY Halloween Trick or Treat Bags with Cricut
An Even Easier Way to Make Monograms with Your Cricut