

Ready to learn the purl stitch? In this blog post, we will show you how to knit the purl stitch in easy, step-by-step instructions.
The purl stitch is one of the most basic stitches in knitting, and it’s a great skill to learn early on. Purling may seem a little intimidating at first, but I promise that you’ll be able to master it with just a little practice. Soon enough, you’ll be able to use the purl stitch to make beautiful scarves, hats, and even sweaters!
So whether you’re a knitting beginner, or just need a quick review, read on for our tutorial on how to make the purl stitch!

All About the Purl Stitch
The purl stitch is one of the most basic stitches in knitting, and it is often the second stitch that beginners learn – right after the knit stitch.
If you’ve been following along in our Learn to Knit series, you may have already learned how to cast on and how to make a basic knit stitch.
Once you master the purl stitch, you’ll unlock a whole new set of knitting patterns, like stockinette stitch, ribbing, and seed stitch.
What is a purl stitch?
Think of the purl stitch as the opposite of a knit stitch. Knit stitch and purl stitch are two sides of the same coin – or swatch – if you will.
To make a purl stitch:
Insert your needle into the front leg of the first stitch from right to left, and then wrap the yarn around the needle counterclockwise before pushing the loop back through the stitch, and sliding it off the needle.
(Don’t worry if that description seemed too brief – we’ll go through everything step-by-step in the tutorial below!)
Purling is just about as easy as the knit stitch but might feel a little slower at first, just until you get the hang of it.
Purl Stitch Video
Check out this short looping video of the purl stitch in action. Then, scroll down for a longer video and step-by-step photos.
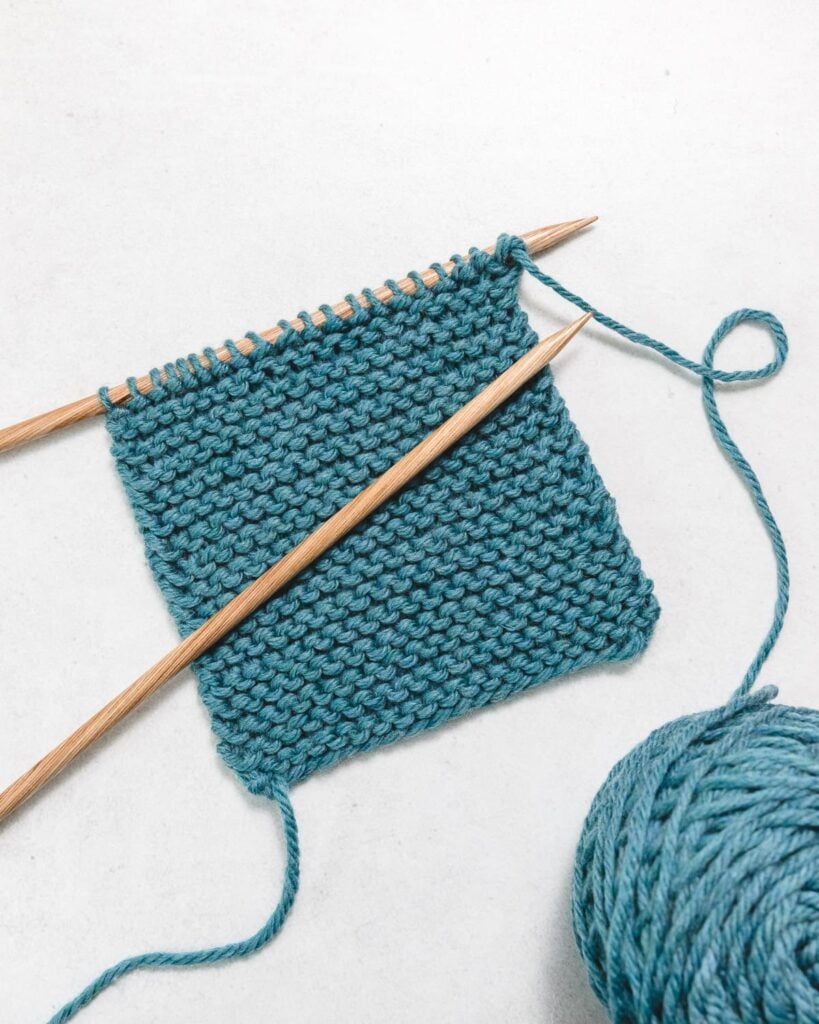
What does a purl stitch look like on the needles?
Knit and purl stitches look pretty different. While the knit stitch looks like a little “v” shape, the purl stitch looks like a small “bump” on the right side of your work.
After you knit a few purl stitches, take a look at your work. You’ll see that the purl stitch is the reverse of the knit stitch.
What do I mean by that? Well, I mean that the front side of a purl stitch is a purl bump, but the backside of a purl stitch looks like a knit stitch. In fact, it is a knit stitch.
When you make a purl stitch, the stitch looks like a purl bump on the front side – aka the side facing you. But, it looks like a knit stitch on the back side – aka the side facing away from you.
Likewise, when you make a knit stitch, the stitch looks like a little “V” on the side facing you, but like a purl bump on the side away from you.
Purl Stitch Abbreviations
In knitting patterns, the purl stitch is often abbreviated as “p.”
If you see a pattern that says “p1”, that means you should make one purl stitch. Or, let’s say you see a pattern that says, “p all” or “Row 2: Purl”. That means you should purl every stitch until the end of the row.
Knitting Supplies
You don’t need anything fancy to learn how to do the purl stitch- just your standard knitting materials.
- Yarn. For beginners, I recommend a smooth, light color yarn in a medium or bulky weight. Chunky yarn works up faster and is easier to see. You can use wool yarn or acrylic yarn – either fiber content is fine. Just avoid novelty yarns, or anything too slippery or lumpy.
- A pair of needles. I recommend wooden or bamboo needles for beginners, since they are less slippery than metal needles. That way, you won’t have to worry about your stitches sliding off accidentally. You can use straight needles or circular needles. The important thing is to choose the needle size that corresponds to the yarn weight you’ve picked.
You can find these materials online, or at your local yarn store.
How to Knit the Purl Stitch
Now that we’ve gone over the basics of the purl stitch, let’s learn how to make one! Follow along with our step-by-step instructions and photos below.
Preparation: Cast On
Before we can start purling, we’ll need to cast on 15-20 stitches for our practice swatch. If you don’t know how to cast on, here’s a step-by-step tutorial on how to do the long-tail cast-on.
Holding the Needles and Yarn
As you might know, there are a few common ways to hold needles and yarn. If you’re new to knitting, check out this How to Hold Your Needles and Yarn tutorial first, and then come back for the purl stitch tutorial.
In the pictures that follow, I’ll be demonstrating the purl stitch in the English (or American) style. That means I’ll be holding the yarn in my right hand.
The English method is sometimes called “throwing” because the knitter throws the yarn around the needle with their right hand.
Note: Another popular style of knitting is called the Continental Method, or German Method. In this method, the yarn is held and tensioned in the left hand.
This style is also known as “picking,” because the knitter picks up the yarn from the left-hand index finger.
If you’d like to learn more about how to purl in the Continental style, click here. One style isn’t necessarily better than the other – choose whichever style feels best to you.
Step One: Insert the Needle into the Stitch
Start by holding the needle with the cast-on stitches in your left hand, and the empty needle in your right hand. I prefer to hold the needles with an overhand grip, which is similar to how you might hold a knife.
Next, tension the yarn with the fingers of the right hand. There are many ways to do this. But for example, you can wind the yarn over the index finger, under the middle finger, over the ring finger, and under the pinkie. Holding the yarn this way creates tension, or friction, on the yarn – and helps you create even stitches.
Then, make sure that the working yarn is at the front of the work. This is very important, and different from the way you hold the yarn for knit stitches. If this is your first time purling, double-check you have this right before moving on.
To knit the purl stitch, insert your right needle into the front loop (or leg) of the first stitch, from back to front, and from right to left.
The right needle should be pointing up through the center of the first stitch, from back to front. And, the right needle should be under the left needle.
Note: Make sure that the tip of the needle slips under the leg of the stitch, and not through the strand of yarn itself. It can be all too easy to split or snag the yarn, especially if you are using sharply pointed needles. If the yarn does split, it’s okay. Just slide the needle out and try again.

Step Two: Wrap the Yarn around the Needle
After inserting the needle into the first stitch, use your right hand to grab the working yarn (i.e. the yarn attached to the ball of yarn). Then, wrap the yarn counterclockwise around the tip of the right needle.
In other words, wrap the yarn around the needle tip from front to back, passing the yarn in between the two needles, and back out to the front of the work. This step will create a loop of yarn on the right-hand needle.
When you do this wrapping motion, you might find it helpful to anchor the right needle with the thumb and middle finger of your left hand. I use my left-hand fingers to pinch the right-hand needle to keep it from falling while wrapping the yarn with my right hand.

Step Three: Draw the Loop through the Stitch
Next, use the right needle to push that loop of yarn down and back through the center of the stitch on the left needle. Think of it as a sliding/pushing motion to move that new loop of yarn under the left-hand needle and to the back.
At the end of this step, the right needle will be behind the left needle, and there will be a new loop of yarn on your right needle. Congratulations, this is your first purl stitch!
If the new stitch is sitting too close to the tip of your right-hand needle, push the needle up a little so that the stitch slides down to the main part of the needle.

Step Four: Slide the New Stitch Off the Needle
Next, slide the right needle to the right until the new stitch slips off the left needle. You have now completed one purl stitch!
Make sure to only slide off the one stitch you just worked. Don’t let any other stitches slide off by accident.
Repeat these steps until you’ve worked all the stitches on the needle. I recommend counting your stitches to make sure you haven’t dropped a stitch or made any extra stitches.

How to Turn Your Work
Once you work all of the stitches on the left-hand needle, you’ll have finished your first row of purling. At this point, the left-hand needle should empty, and all the stitches should be on your right-hand needle. The working yarn should be coming from the left-most stitch on the right-hand needle.
Now it’s time to turn your swatch around so that you can work the next row of stitches. To turn your work, switch the needles around in your hands, so that you’re holding the full needle in your left hand, and the empty needle (aka the working needle) in your right hand.
You’ll know you’ve done it correctly if the working yarn is attached to the right-most stitch on the left-hand needle, next to the needle tip, ready to go.
You’ll need to turn your work around each time you get to the end of the row. Start each row with the full needle in your right hand, and the empty needle in your right hand.
Keep purling until your swatch is as long as you want it to be. If you continue purling each row, you’ll be making garter stitch! (Yes, you read that right. You can make garter stitch by knitting every row or purling every row.)
And that’s it! You’ve learned how to knit the purl stitch. Congrats!
Practice this stitch until you feel comfortable with it, and then move on to learning other stitches. (I suggest that you learn how to cast off/bind off next!)
Tips for Knitting the Purl Stitch
Here are a few things to keep in mind when knitting the purl stitch:
- Start with the working yarn in the front of the work. At the beginning and end of each stitch, the yarn should still be at the front of your work.
- Make sure that you insert the needle under the front loop of the stitch, from back to front and from right to left.
- Wrap the yarn counterclockwise around the needle, from front to back, then between the needles, and around to the front.
- Use the right needle to push the new loop of yarn down and back through the stitch on the left needle. Be careful not to drop the loop of yarn. But if you do, that’s okay. Back up to Step 1 and try again.
- If your new purl stitch feels a little loose, you can tug on the working yarn to tighten it up.
Rhyme for Remembering the Purl Stitch
Having trouble keeping track of the steps? I totally understand. Here’s a little rhyme to help you remember how to knit the purl stitch:
In under the fence, (insert your needle)
Grab that sheep, (wrap the yarn counterclockwise)
Back under the fence, (draw the loop through the stitch)
And off we leap! (slide the stitch off the needle)
This cute rhyme is great for teaching children how to purl – but it’s helpful for a lot of adults, too!

Purling Vs. Knitting
There are a few main differences when it comes to purling vs. knitting.
Yarn placement: To purl, hold the working yarn to the front of your work. (To knit, hold the yarn to the back of the work.)
Needle placement: To make a purl stitch, you’ll insert the needle under the front leg of the stitch from back to front, and from right to left. (To make a knit stitch, you’ll insert the needle from front to back, from left to right.)
Wrapping the yarn: To make a purl stitch, you’ll wrap the yarn around the needle counterclockwise. The yarn will start in the front, go around the back, and end up back in the front. (To make a knit stitch, you’ll wrap the yarn counterclockwise from back to front.)
FAQ about the Purl Stitch
Here are some frequently asked questions and troubleshooting tips about knitting the knit stitch.
I can’t seem to get my purl stitch right, and it’s really frustrating!
Don’t worry; it takes practice to get the purl stitch down. Everyone starts at the beginning! Just keep at it, and make low-pressure practice swatches until your feel more confident.
My stitches are really loose, and I can’t seem to tighten them.
A lot of people have trouble with their tension when they’re first learning how to purl – even if they don’t have any problem making knit stitches.
If your purl stitches feel too loose, check your tension. Are you holding the yarn too loosely? Practice wrapping the yarn around your needle while holding the yarn a little more tightly. It will take some practice to find the right balance between holding the yarn too loosely/too tightly – but you’ll get the hang of it.
If your tension is good, but your stitches are still loose, try tugging on the working yarn a little after you finish each purl stitch. This will help to tighten up the loop of yarn.
My stitches look twisted.
Are you sure you inserted the needle into the front loop of the stitch? If you accidentally purl into the back loop of the stitch, it will twist the stitch.
To fix this, make sure you insert your needle under the front loop of the stitch, from left to right.
What do I do with my yarn when I’m not wrapping it?
After you’ve wrapped the yarn counterclockwise around the needle, it should be at the front of your work. Pick it up again, and hold it tensioned in your right hand. You don’t want the yarn to hang loose.
I dropped a stitch! Help!
Dropping a stitch is really easy to do, but don’t worry. It’s also easy to fix. If you catch it right away, you can carefully pick up the stitch and put it back on the needle. Make sure not to twist it.
I ended up with some extra stitches. How did that happen?
The most common reason for extra stitches is unintentional yarn-overs. Yarn-overs happen when you bring the working yarn to the front of the needle before purling.
What is the difference between purl stitch and stockinette stitch?
The purl stitch is a stitch technique and refers to just one stitch. Stockinette stitch (aka stocking stitch) is a stitch pattern and refers to an alternating pattern of knit rows and purl rows.
Garter stitch, on the other hand, is a stitch pattern created by knitting every row. You can also create garter stitch by purling every row – though that is sometimes referred to as “reverse garter stitch”.
More Knitting Tutorials
New knitters may want to check out these other step-by-step tutorials and beginner-friendly stitch patterns.
- How to Knit: A Beginner’s Guide
- How to Knit the Knit Stitch
- How to Cast On
- How to Cast Off
- How to Knit Stockinette Stitch
- How to Knit Garter Stitch
- How to SSK (Slip Slip Knit) in Knitting
Easy Knitting Patterns for Beginners
Once you feel comfortable with the basic knitting skills, you’re ready to start your first knitting project. I recommend one of these easy knitting patterns to practice your new techniques. Each of these easy patterns was selected with the beginner knitter in mind. You find a variety of projects, from the simple scarf to the classic ribbed beanie.
What’s Next?
Pin this post: Save this tutorial to your Pinterest boards so that you can come back to it later.
Leave a comment: We love to hear your feedback. Tell me in the comments below!
Share on Instagram or Facebook: When you make this project, share it on social media and tag me @sarahmaker_. We love to see what you make!
Have questions? Join the Facebook Group!
We hope this article was useful for you! If you have any additional questions, feel free to join my Facebook Group. We created this group for you to share pictures, ask questions, and help each other out.


How to Knit the Purl Stitch
Learn how to knit the purl stitch for beginners with easy, step-by-step instructions with a demonstration video and plenty of clear photos.
Materials
- Yarn
Tools
- Knitting Needles
Instructions
- Insert the Needle into the Stitch. Start by holding the needle with the cast-on stitches in your left hand, and the empty needle in your right hand. Next, tension the yarn with the fingers of the right hand. Then, make sure that the working yarn is at the front of the work. To knit the purl stitch, insert your right needle into the front loop (or leg) of the first stitch, from back to front, and from right to left.

- Wrap the Yarn around the Needle. Use your right hand to grab the working yarn, then wrap the yarn counterclockwise around the tip of the right needle.
- Draw the Loop through the Stitch. Use the tip of the right needle to push that loop of yarn down and back through the center of the stitch on the left needle. At the end of this step, the right needle will be behind the left needle and there will be a new loop of yarn on your right needle.
- Slide the Stitch Off the Needle. Slide the right needle to the right until the new stitch slips off the left needle. Make sure to only slide off the one stitch you just worked.
- You have now completed one purl stitch! Repeat these steps until you’ve worked all the stitches on the needle.


Notes
Here are a few things to keep in mind when knitting the purl stitch:
- Start with the working yarn in the front of the work. At the beginning and end of each stitch, the yarn should still be at the front of your work.
- Make sure that you insert the needle under the front loop of the stitch, from back to front and from right to left.
- Wrap the yarn counterclockwise around the needle, from front to back, then between the needles, and around to the front.
- Use the right needle to push the new loop of yarn down and back through the stitch on the left needle. Be careful not to drop the loop of yarn. But if you do, that’s okay. Back up to Step 1 and try again.
- If your new purl stitch feels a little loose, you can tug on the working yarn to tighten it up.


Similar Posts
25 Easy & Free Knit Blanket Patterns to Keep You Cozy
25 Free Knit Leg Warmer Patterns (For All Skill Levels!)
25 Free Headband and Ear Warmer Knitting Patterns
25 Free and Easy Knitting Patterns for Beginners
25+ Free Scarf Knitting Patterns for Beginners
27 Free Knit Poncho Patterns for All Seasons