

Setting up a new Cricut machine can be exciting – but it can also be a little intimidating! If you need to set up a new Cricut machine, this blog post is for you. I’ll show you the easy steps to complete the setup process so that you can move on to the fun part – making your first project!

Congratulations! You’ve just brought a new Cricut machine home from the store – how exciting. Now you’re ready to unbox it and find the perfect spot for it in your craft room. You know you need to set it up before you can make your first Cricut project – but where do you start?
I get it; the first time setting up a new Cricut machine can be a little overwhelming. That’s where this blog post comes in. It’s a complete guide to getting your new Cricut out of its box and working correctly, so you can start making projects.
And if you are a total beginner, don’t worry. This blog post will guide you through the entire process of setting up a brand new Cricut with clear step-by-step instructions. And, once we’re done setting up the machine, we’ll also go over some essential tips and tricks to help make sure you get the most out of your new machine.
Cricut Setup Guide
This blog post will guide you through the new machine setup and ensure your Cricut is running smoothly! Here’s what we’ll cover in this article:
- What you’ll find in the Cricut box
- How to plug in and turn on your Cricut for the first time
- How to download the Design Space software (Yes, it’s free!)
- The easy steps to connect your Cricut to your computer, tablet, or phone (either iPhone or Android device.)
In very basic terms, here are the steps to set up a new Cricut.
- Plug in and turn on your machine.
- Pair the machine to your computer or mobile device with the USB cord or Bluetooth
- Go to Cricut.com/setup to download Design Space.
- Follow the on-screen prompts to complete the setup process.
Seems simple, right? Keep reading to go through everything in a little more detail.
Opening the Box
First things first, let’s open up the box. Each Cricut machine model – the Cricut Maker 3, the Cricut Explore 3, and the Cricut Joy – is packaged with a few accessories and tools to help you get started.
For more information about the Cricut tools you really need, read my Ultimate Guide to Cricut Tools and Accessories.
Let’s go through each of the three different models.
What’s in the Cricut Maker 3 Box
In the Cricut Maker 3 box, you’ll find:
- Cricut Maker 3 machine
- A power adapter.
- A USB cable for connecting to a computer or mobile device
- Premium Fine Point Blade and blade housing
- Sample materials for making your first practice cut
- Free trial subscription of Cricut Access membershipmembership
While the older version of the Cricut Maker came bundled with two Cricut mats, a rotary blade, and a Cricut pen – the new Cricut Maker 3 does not.
If you’ve purchased a Cricut Maker 3 bundle (which I often recommend), you’ll have more accessories and materials to open. You’ll get a variety of Smart Materials, transfer tape, Cricut pens, and an Essential toolset (including weeding tools, a scraper tool, and scissors.)
What’s in the Cricut Explore 3 Box
In the Cricut Explore 3 box, you’ll find:
- Cricut Explore 3 machine
- A power adapter.
- A USB cable for connecting to a computer or mobile device
- Premium Fine-Point Blade and housing
- Sample materials for making your first practice cut
- Free trial of Cricut Access membership for new subscribers
While the older model Cricut Explore Air 2 came bundled with a LightGrip cutting mat and a fine-point pen – the new Cricut Explore 3 does not.
If you’ve purchased a Cricut Explore 3 bundle (always a good idea), you’ll have more accessories and materials to open. You’ll get a variety of materials, including Smart Vinyl, Iron-On, transfer tape, Cricut pens, and an Essential toolset (including weeding tools, a scraper tool, and scissors.)
What’s in the Cricut Joy Box
In the Cricut Joy Box, you’ll find:
- The Cricut Joy machine
- Power adapter
- Cricut Joy Blade and housing
- Fine Point Pen
- StandardGrip Mat, 4.5″ x 6.5″
- Materials for a practice cut
The Cricut Joy does not come with a USB cable since it connects to your computer or mobile device with Bluetooth wireless technology.
If you’ve purchased a Cricut Joy bundle, you’ll also receive a variety of Smart Materials, like Vinyl, Iron-On, or Smart Labels.
Cricut Machine Layout
Now that you’ve opened up the box and laid out all of your accessories, I’m sure you’re eager to learn all about your new Cricut machine.
Cricut Maker 3 Machine Tour
Let’s take a tour of your new Cricut Maker 3 cutting machine.
Cords
The power cord plugs into the back of the machine. The USB cord plugs in the USB port on the right-hand side of the machine.
The Machine Itself
To open the machine, lift the lid. You’ll see the front door open automatically. The first time you open the machine, you’ll see a piece of protective foam around the carriage/tool clamps. You can go ahead and remove it.
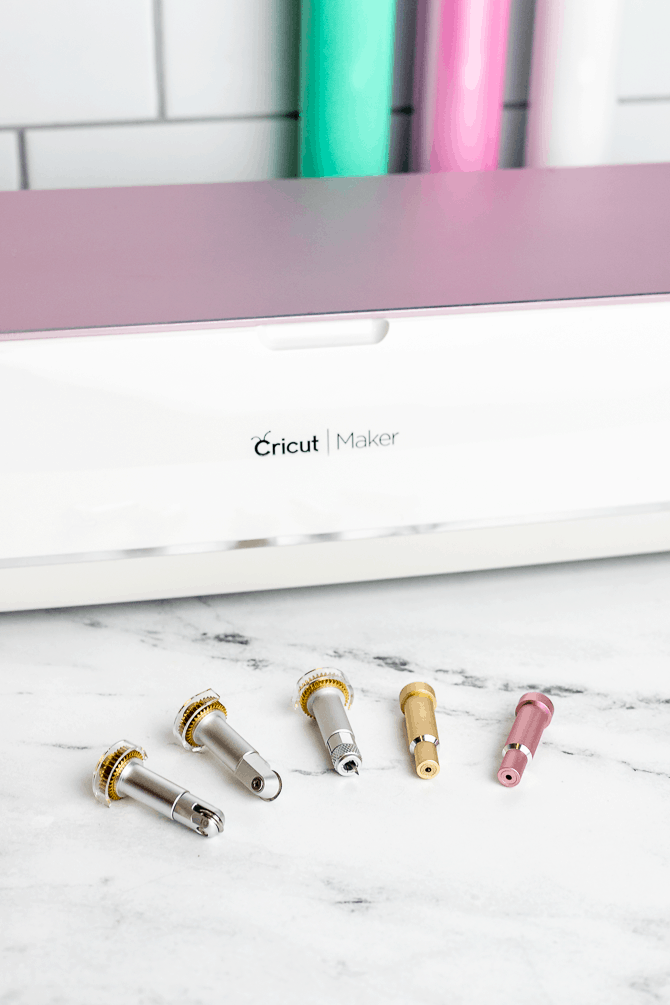
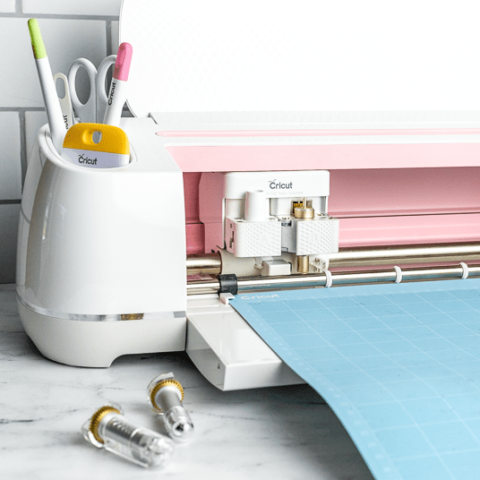
Inside the machine, you’ll see the tools clamps A and B, which hold the blades and pens. You’ll also see the mat guides, which help you align the Smart Materials and cutting mats. And finally, you’ll see the roller bars, which move the mat around as the machine cuts.
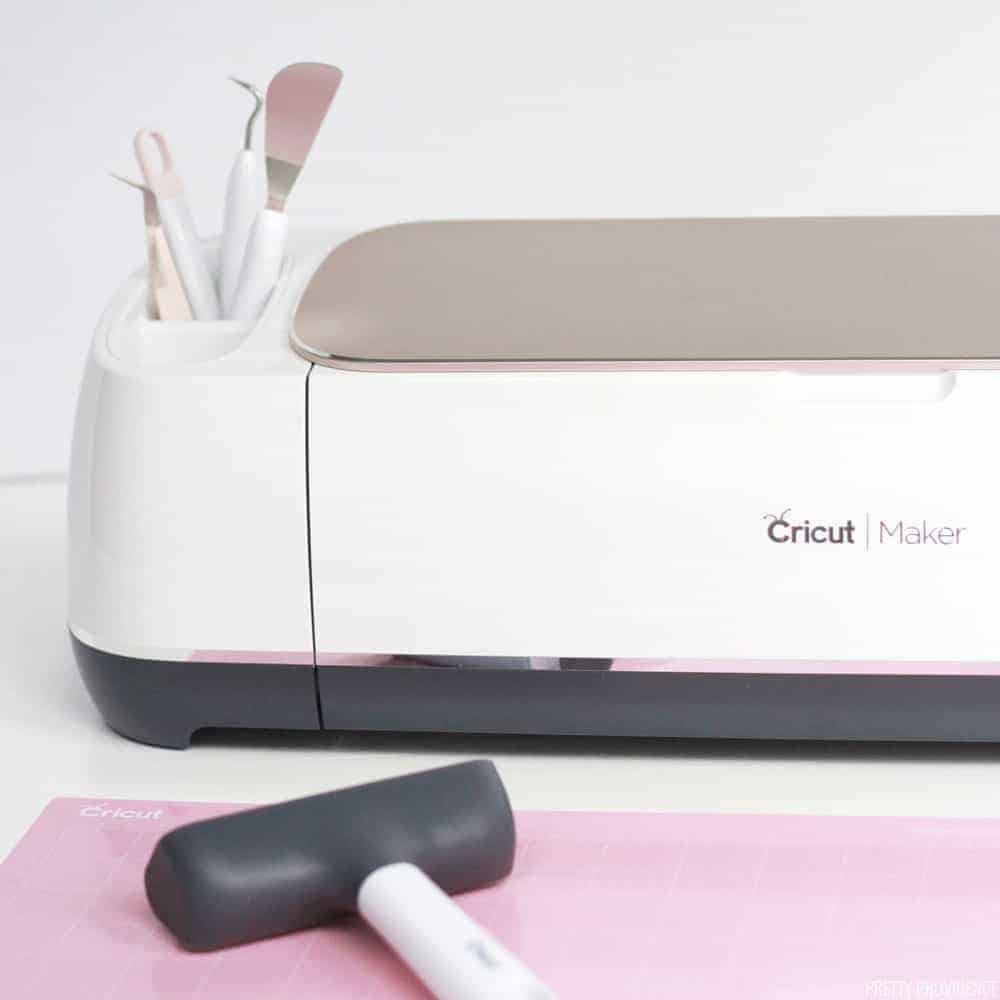
There is a tray inside the front door to store tools and pens. There is also a tool cup on the left-hand side of the machine, which is the perfect spot to store your weeding tools and tweezers.
There’s also a slot in the lid that you can use to hold your tablet or smartphone as you use the machine.
Buttons
The Power button turns the machine on and off.
The Load button (up and down arrows) loads and unloads Smart Materials and cutting mats into the machine.
The Go button (triangle) flashes to let you know the machine is ready to cut. Press the Go button to start cutting your projects.
And the Pause button (vertical lines) stops the machine.
Design Space
If you haven’t yet activated your machine, you’ll need to do so at Cricut.com/setup. You can also set up a new machine from inside the Design Space app. Click the menu icon, and then click “New Product Setup.” Select your Cricut model, and follow the prompts.
The Design Space app will also prompt you when it’s time to switch out tools and pens in the tools clamps.
Cricut Explore 3 Machine Tour
Let’s take a tour of your new Cricut Explore 3 cutting machine.
Cords
The power cord plugs into the back. The USB cord plugs in the port on the right-hand side of the machine.
The Machine Itself
To open the machine, press the Open button on the top of the machine, over on the left side. You’ll see the lid lift up, and the front door opens automatically. The first time you open the machine, you’ll see a piece of protective foam around the carriage/tool clamps. You can go ahead and remove it.
Inside the machine, you’ll see the tools clamps A and B, which hold the blades and pens. You’ll also see the mat guides, which help you align the Smart Materials and cutting mats. And finally, you’ll see the roller bars, which move the mat around as the machine cuts.
There is a tray inside the front door to store tools and pens. There is also a tool holder cup on the left-hand side of the machine that you can use to hold your weeding tools and tweezers.
There is a slot in the lid that you can use to hold your tablet or smartphone as you use the machine.
Buttons
The Power button turns the machine on and off.
The Load button (up and down arrows) loads and unloads Smart Materials and cutting mats into the machine.
The Go button (triangle) flashes to let you know the machine is ready to cut. Press the Go button to start cutting your projects.
And the Pause button (vertical lines) stops the machine.
Design Space
If you haven’t yet activated your machine, you’ll need to do so at Cricut.com/setup. You can also set up a new machine from inside the Design Space app. Click the menu icon, and then click “New Product Setup.” Select your machine model, and follow the prompts.
The Design Space app will also prompt you when it’s time to switch out pens and tools in the two clamps (A and B).
Cricut Joy Machine Tour
Let’s take a tour of your new Cricut Joy cutting machine. Compared to the other machines, the Cricut Joy is a lot simpler.
Cords
The power cable plugs into the back. There is no USB cord since Cricut Joy connects with Bluetooth.
The Machine Itself
To open the machine, flip down the lid. The first time you open the machine, you’ll see a piece of protective foam around the carriage/tool clamp. You can go ahead and remove it.
Inside the machine, you’ll see a single tool clamp, which holds the blade or pen. You’ll also see the mat guides, which help you align the Smart Materials and cutting mats. And finally, you’ll see the roller bars, which move the mat around as the machine cuts.
There is no storage tray or tool cup on the Cricut Joy.
Buttons
The Cricut Joy doesn’t have any buttons. All the “buttons” you’ll need will be available to you within the Design Space app. Click the Go button within the Design Space app, then load the material. The Cricut Joy will load the material, measure it, and then begin the cut. Make sure to press the button within Design Space to unload the material first before taking it out of the machine.
Design Space
If you haven’t yet activated your machine, you’ll need to do so at Cricut.com/setup. You can also set up a new machine from inside the Design Space app. Click the menu icon, and then click “New Product Setup.” Select your machine model, and follow the prompts.
The Design Space app will also prompt you when it’s time to switch out pens and tools in the single clamp.
Setting up a New Cricut Machine
After you’ve opened up the box and plugged in your machine, it’s time to set it up.
If you have the choice, I recommend setting up your Cricut with a desktop computer or laptop. (You can use a phone or mobile device to set up a machine too, it’s just not my preference.)
How to Setup a Cricut with a computer:
- Open up an internet browser window, and go to cricut.com/setup.
- Download and install the Cricut Design Space app for Desktop.
- Follow the on-screen instructions to create and sign in with a Cricut ID.
- On the next screen, select your machine.
- Plug in the machine with the power cord and press the Power button to turn it on.
- Use the included USB cord to connect the machine to your computer, or pair it via Bluetooth. (Joy machines must use Bluetooth.)
- At this point, Design Space may ask you to wait while it updates your machine.
- Then, Design Space will prompt your to register your machine and ask if you if want to try a free trial of Cricut Access Membership.
- Finally, we get to make the first cut! Follow the rest of the prompts to make your very first project.
How to set up a Cricut with a mobile device:
This process is very similar to the one above – just using the Design Space app for phones or iPads.
- Download and install the Design Space app.
- Launch the app, then sign in or create a Cricut ID.
- Tap the menu and select Machine Setup. Select your machine model.
- Following the on-screen prompts, plug in the Cricut machine with the power cord, and turn it on.
- Pair your Cricut machine to your Android or iOS device via Bluetooth.
- You will know the setup is complete when Design Space prompts you to make the first test cut.
How to Connect your Cricut via Bluetooth
You can connect your Cricut Maker, Explore, or Joy machines to your computer or mobile device via Bluetooth. (Most computers have Bluetooth capability – if yours doesn’t, you’ll need to connect with the USB cord instead.)
To get started, make sure that your Cricut Explore or Cricut Maker machine is powered on and within 10-15 feet of your computer. Then, follow the steps below to pair them with your computer or mobile device.
Windows: Click on the Start button and select Settings. Then select Devices. Make sure that Bluetooth is turned on and click Add Bluetooth device. Select Bluetooth and wait for your computer to find your Cricut machine. (The “name” of your Cricut Bluetooth module is located on the bottom of the machine, near the serial number.) Select your machine, and enter the Pin 0000 if prompted.
Mac: Open the Apple menu, and select System Preferences. Then select Bluetooth. Make sure Bluetooth is turned on. Find your machine in the list, and click Pair. If prompted, used the Pin 0000.
iOS: Open the Settings app, and select Bluetooth. Make sure Bluetooth is turned on. Find your machine in the list of devices. When prompted, type PIN 0000.
Android: Open the Settings app, and select Bluetooth. Make sure Bluetooth is turned on. Find your machine in the list of devices. When prompted, type PIN 0000, and choose OK.
If you run into trouble trying to connect your Cricut device via Bluetooth, the best thing to do is to contact Cricut support or the Member Care team.
How to Connect your Cricut via USB
If you don’t have Bluetooth or prefer not to use it, you can also connect your Cricut to your computer with a USB cable. Plug one end of the USB cable into the port on the side of the Cricut machine and the other end of the cable into the port on your computer.
Note: The Cricut Joy model does not come with a USB cable.
Cricut Tutorials for Beginners
Hooray! Pat yourself on the back because you’ve successfully set up your Cricut machine. Now it’s time to get crafting!
Here are some of my best beginner Cricut tutorials. I recommend reading a bit about Cricut Design Space and the different types of Cricut crafting materials to get started. Then, try out one of the beginner-friendly project tutorials!
Cricut Design Space Tutorials
- How to Connect Cursive Letters in Cricut Design Space
- When to Use Weld vs. Attach in Cricut Design Space
- How to Make a Monogram in Cricut Design Space
Cricut Project Ideas for Beginners
- How to Make Rolled Paper Flowers with Cricut
- How to Etch Glass with Armour Etch and Cricut
- How to Make a Stencil with Cricut
- How to Make Shirts with Cricut Iron-On Vinyl
More Cricut Tutorials
- Cricut Comparison: Which Cricut Machine is the Best for You? [2021]
- What is a Cricut Machine, and What Can it Do?
- How to Clean a Cricut Mat and Make it Sticky Again
- How to Make Stickers with Cricut “Print then Cut”
What’s Next?
Pin this post: Save this tutorial to your Pinterest boards so that you can come back to it later.
Leave a comment: We love to hear your feedback. Tell me in the comments below!
Share on Instagram or Facebook: When you make this project, share it on social media and tag me @sarahmaker_. We love to see what you make!
Have questions? Join the Facebook Group!
We hope this article was useful for you! If you have any additional questions, feel free to join my Facebook Group. We created this group for you to share pictures, ask questions, and help each other out.

How to Set Up Your New Cricut (Maker, Explore, or Joy)
How to set up your new Cricut machine for the first time, so you can finally get it out of the box and start crafting.
Materials
- Cricut machine
Tools
- Computer or Mobile Device
- Design Space app
Instructions
How to set up a Cricut with a computer:
- Open up an internet browser window, and go to cricut.com/setup.
- Download and install the Cricut Design Space app for Desktop.
- Follow the on-screen instructions to create and sign in with a Cricut ID.
- On the next screen, select your machine.
- Plug in the machine with the power cord and press the Power button to turn it on.
- Use the included USB cord to connect the machine to your computer, or pair it via Bluetooth. (Joy machines must use Bluetooth.)
- At this point, Design Space may ask you to wait while it updates your machine.
- Then, Design Space will prompt your to register your machine and ask if you want to try a free trial of Cricut Access Membership.
- Finally, we get to make the first cut! Follow the rest of the prompts to make your very first project.
How to set up a Cricut with a mobile device:
- Download and install the Design Space app.
- Launch the app, then sign in or create a Cricut ID.
- Tap the menu and select Machine Setup. Select your machine model.
- Following the on-screen prompts, plug in the Cricut machine with the power cord, and turn it on.
- Pair your Cricut machine to your Android or iOS device via Bluetooth.
- You will know the setup is complete when Design Space prompts you to make the first test cut.
Notes
Go to Cricut.com/setup to start!


Similar Posts
How to Make Stickers with Cricut “Print then Cut”
How to Cut Vinyl with Cricut: A Step by Step Guide for Beginners
How to Make a Monogram in Cricut Design Space
How to Slice in Cricut Design Space: The Complete Guide
Guide to Cricut Mats: Different Types and Sizes
25 Cricut Christmas Ornament Ideas