

The diamond friendship bracelet pattern is beautiful and fun to make. Although it looks advanced, it’s actually quite easy! If you like to make friendship bracelets, you should give this diamond design a try!

Diamond and X’s Design
Once you’ve masted the basic candy stripe bracelet and chevron bracelet pattern, you might be looking for an advanced friendship bracelet pattern to try. If you’re ready for a little challenge, try this fun diamond and x’s design.
Before we get started, I’d recommend reviewing how to make the four basic knots for friendship bracelets.
Here are the knots you’ll need for this pattern.
- forward knot
- backward knot
- forward-backward knot
- backward-forward knot
You’ll also need 4 colors of embroidery floss. Check out this article for some color scheme inspiration: Friendship Bracelet Color Ideas and Combinations
Pattern Chart
Before we move on to the written pattern, I want to show you the pattern chart for the Diamond and X’s pattern.
You can see that starts out very similar to the chevron bracelet pattern before it switches direction into an inverted chevron pattern. This creates the diamonds and x’s shape.

If you would like to learn how to read charts like the one below, check out How to Read Friendship Bracelet Patterns. Once you learn to read friendship bracelet patterns, you’ll be able to make any design you come across.

Pattern Instructions
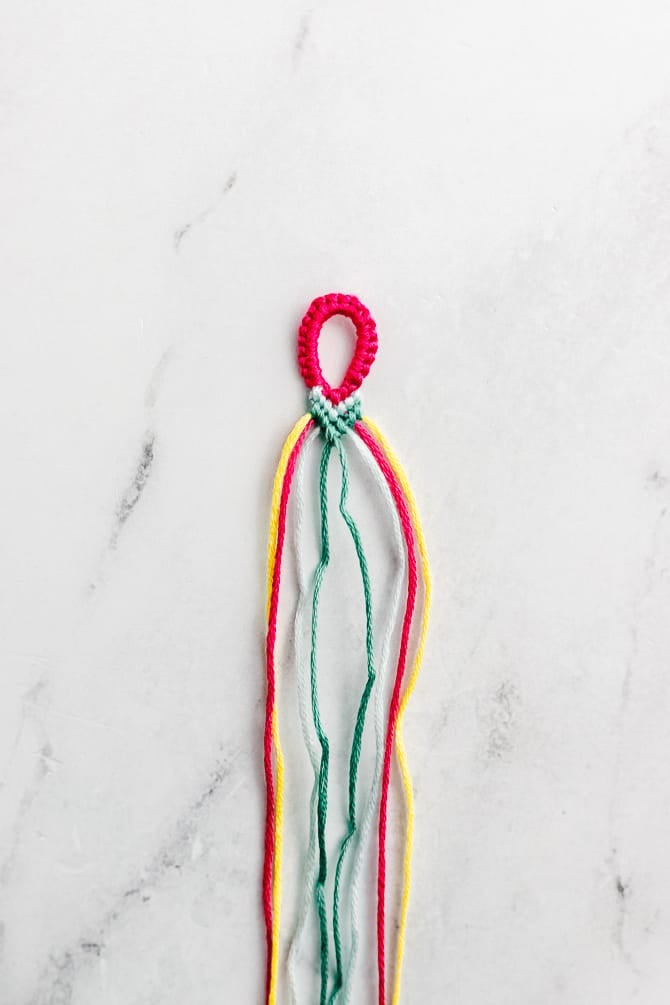
Step 1: Start by preparing the strings. Cut 4 strings 72″ long. Fold in half, so that you have 8 strings that are 36″ long. Tie a knot on the folded end OR make a loop buckle.
I started this friendship bracelet off with a loop buckle. It’s a great way to make a bracelet removable. To learn more about loops, check out: How to Make A Friendship Bracelet Loop (Buckle)
To finish the buckle: Use the left pink string to tie a forward knot onto the yellow string. Use the right pink string to tie a backward knot onto the other string. Then tie the pink strings together with a forward knot.
Arrange the strands in your chosen color order, in such a way that the color order mirrors itself. For example, the 8 strings in my bracelet would be light blue, teal, yellow, pink, pink, yellow, teal, light blue. Or, if you were to label the strings, they would go: ABCDDCBA
Secure the strings with a safety pin, under a clipboard, or with masking tape.
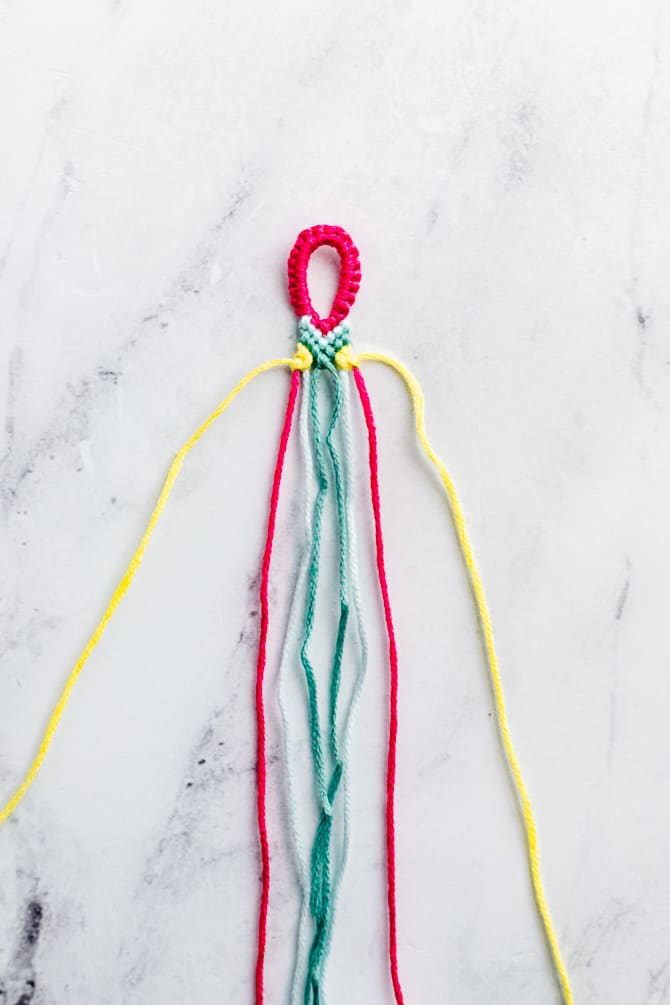
Step 2: This bracelet starts out similar to the chevron friendship bracelet pattern.
Starting with the outermost left-hand string (light blue) tie forward knots on the next three strings until you reach the middle.
Remember: Forward knots are tied by making a “4” shape with the working string over the second string. Remember, each knot in a friendship bracelet consists of two half-hitch knots. Click for more details about how to tie friendship bracelet knots.
Then, with the outermost right-hand string (the other light blue string), tie backward knots on the next three strings until you reach the middle.
Backward knots are tied by making a “P” shape with the working string over the second string. Remember, each knot in a friendship bracelet consists of two half-hitch knots.
To finish the point at the center of the “V” shape, use the left-hand light blue string to tie a forward knot around the right-hand light blue string.
(Technically, it doesn’t matter if you make a forward or backward knot – as long as you knot one light blue string around the other.)
Your first row is now complete! At this point, you should notice that the order of the colors has changed. If we started with the order ABCDDCBA, it should now be BCDAADCB.

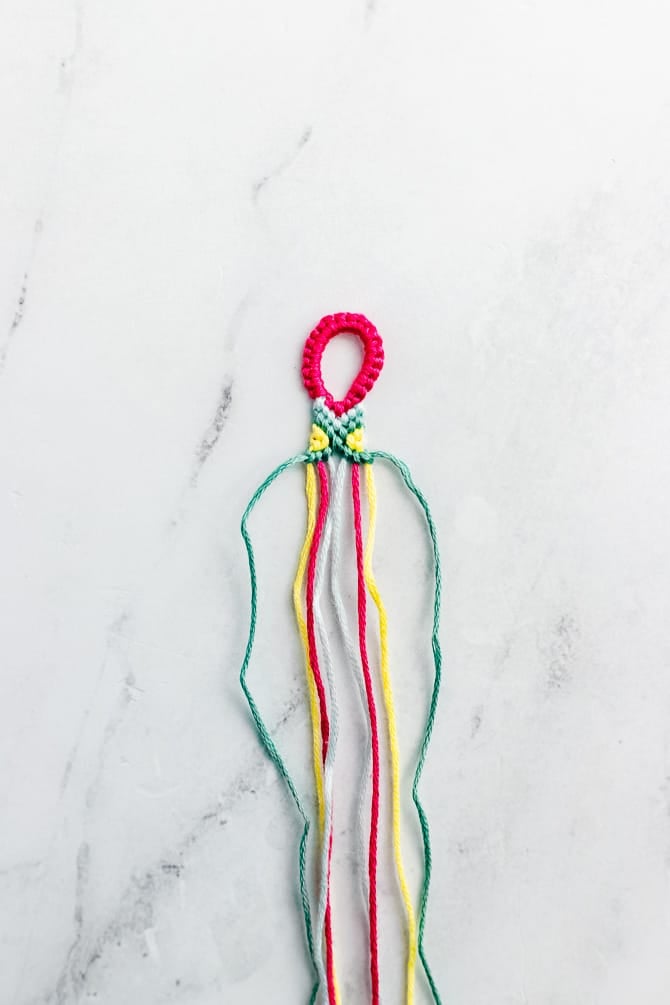
Step 3: Use the teal string to make another row, following the same process. Use the new left-hand string (teal) to make forward knots until you reach the middle. Then, use the new right-hand string (the other teal) to make backward knots until you reach the center. Tie the two teal strings together with a forward knot.
Step 4: Now it’s time to work with the yellow strings. Use the left-hand yellow string to make a forward knot around the pink string. Then, use the yellow string to make a forward-backward knot around the light blue string. Third, use the yellow string to make a backward knot around the pink string.
Mirror this process on the other side. Use the right-hand yellow string to make a backward knot around the pink string. Then, use the yellow string to make a backward-forward knot around the light blue string. Third, use the yellow string to make a forward knot around the pink string.
Step 5: Use the teal strings to finish the X shape. Starting with the left teal string, make backward knots onto each the left three strings until you reach the outer left-hand side.
Mirror that process with the other teal string. In other words, use the right teal string to make forward knots onto the right three strings until you reach the outer right-hand side.
After this step, each of the teal strings should be on the outside.
Step 6: Continue the inverse chevron pattern with the light blue strings.
First, tie both of the light blue strings together with a forward knot. Then, use the left light blue string to make backward knots onto each the left three strings until you reach the outer left-hand side.
Mirror that process with the other light blue string. In other words, use the right light blue string to make forward knots onto the right three strings until you reach the outer right-hand side.
After this step, each of the light blue strings should be on the outside.

Step 7: Tie the pink strings together with a forward knot. Use the left pink string to make a backward knot on the yellow string, and then a backward-forward knot on the teal string. Use the right pink string to make a forward knot on the yellow string and a forward-backward knot on the teal string.
After this step, the light blue strings should still be on the outside.
Step 8: Tie the yellow strings together with a forward knot. Use the left pink string to make a forward knot on the left yellow string. Use the right pink string to make a backward knot on the right yellow string. Then, tie the two pink strings together with a forward knot.
After this step, you have finished one repeat of the pattern chart.
Continue until your bracelet is as about 7″ long, or as long as you’d like.
To learn about the different ways to finish friendship bracelets, check out How to End Friendship Bracelets for A Finished Look.
What’s Next?
Pin this post: Save this tutorial to your Pinterest boards so that you can come back to it later.
Leave a comment: We love to hear your feedback. Tell me in the comments below!
Share on Instagram or Facebook: When you make this project, share it on social media and tag me @sarahmaker_. We love to see what you make!


Similar Posts
How to Make a Chevron Friendship Bracelet
How to Start A Friendship Bracelet with a Loop (Buckle)
19 Easy Friendship Bracelet Patterns for Beginners
How to Start and End Friendship Bracelets for A Finished Look
Friendship Bracelet Color Ideas and Combinations
How to Read Friendship Bracelet Patterns