

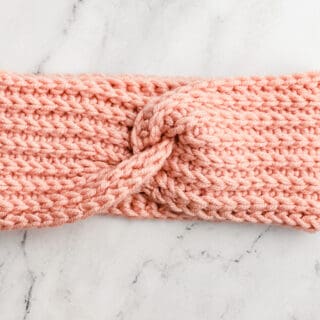
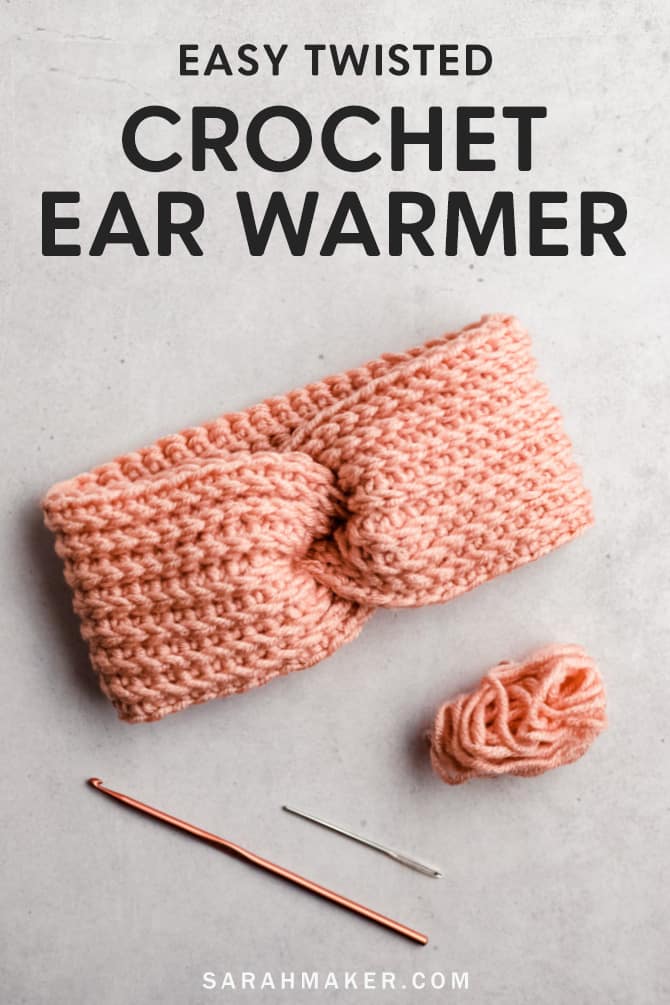
Learn how to crochet a cute and cozy ear warmer headband with a twist front and a knit-look stitch pattern. I love this crochet headband pattern because it’s beautiful and functional! The bulky weight yarn is super warm and will keep your ears nice and toasty this fall and winter.
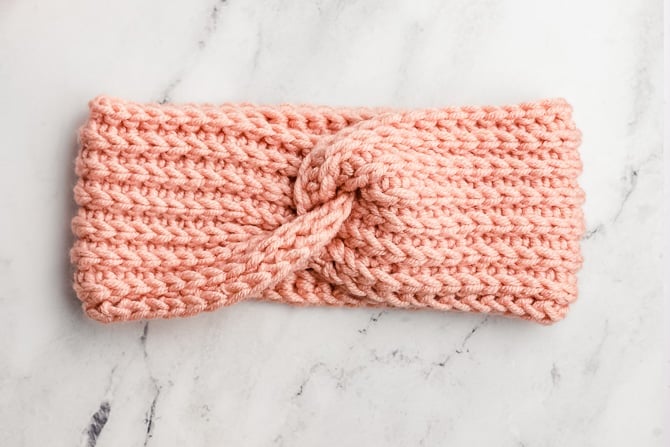
Crochet Ear Warmer with a Twist
I love making crochet headbands to keep my ears warm in the winter. They are easy to wear with lots of different hairstyles, like ponytails or messy buns.
Though the front twist may look complicated, I promise that it’s really easy to do. The headband itself is worked flat in rows. It’s joined into a loop with one simple seam. And, the clever design of the seam creates the look of a twist.
I really like this slip stitch/single crochet ribbing pattern because it mimics the look of knitted ribbing.
So, if you know how to crochet a rectangle, you can definitely make this ear warmer. Let’s get to it.

Twist-Front Crochet Headband Pattern
Skill Level: Easy
Finished Size: 21” diameter
To make it bigger or smaller in diameter, you can add or subtract starting chains. See more information under “Sizing Notes”
Materials
Suggested Yarn: Lion Brand Color Made Easy
Yarn Weight: Bulky, Category 5
Hook Size: K 10.5 (6.5 mm)
Gauge: 12 sts/15 rows = 4 inches in pattern stitch
You’ll Also Need
- blunt tapestry needle to sew the seam
- stitch markers, if desired
- ruler or tape measure, if desired
Stitch Reference and Abbreviations
This pattern uses US crochet terminology.
- blo (back loop only): To crochet in the back loop of a stitch, insert your crochet hook underneath the back loop only and make the stitch as indicated in the pattern.
- ch: chain
- sc: single crochet
- sl st: slip stitch
- st/sts: stitch/stitches
Crochet Ear Warmer Pattern Notes
- When working in rows, the turning chain does not count as a stitch.
- Adjust the number of starting chains in Row 1 for a larger or smaller size head.
Sizing Notes
To account for the stretchiness of the crochet fabric, you’ll want to make a headband that measures 1″-2″ less than your head circumference.
For example, if you are making this headband for a medium-sized adult with a head circumference of 22″, you’ll want to chain enough stitches to make an ear warmer that measures 21″.
The following list gives the sizes of the finished ear warmers.
- Toddler: 17″, chain 52.
- Child: 18″, chain 55.
- Teen or Adult Small: 20″, chain 61.
- Adult Medium: 21″, chain 64.
- Adult Large: 22″, chain 67.
This headband isn’t quite as stretchy along its length as, let’s say, the brim of crocheted beanies. As such, you won’t want the same amount of negative ease. (Negative ease, in this instance, refers to the difference between the finished size of the headband and the actual size of the head.)

1
Method
Row 1: Ch 64 (or the number of chains determined in the size chart above). Sc in 2nd ch from hook, 1 sc in each ch across. Ch 1 and turn. (63)
Row 2: Sl st blo in each st across. Ch 1 and turn. (63)
Row 3: Sc blo in each st across. Ch 1 and turn. (63)
Repeat, alternating Rows 2 and 3 for a total of 15 rows, ending on a sc row, or until the headband measures 4” in width.
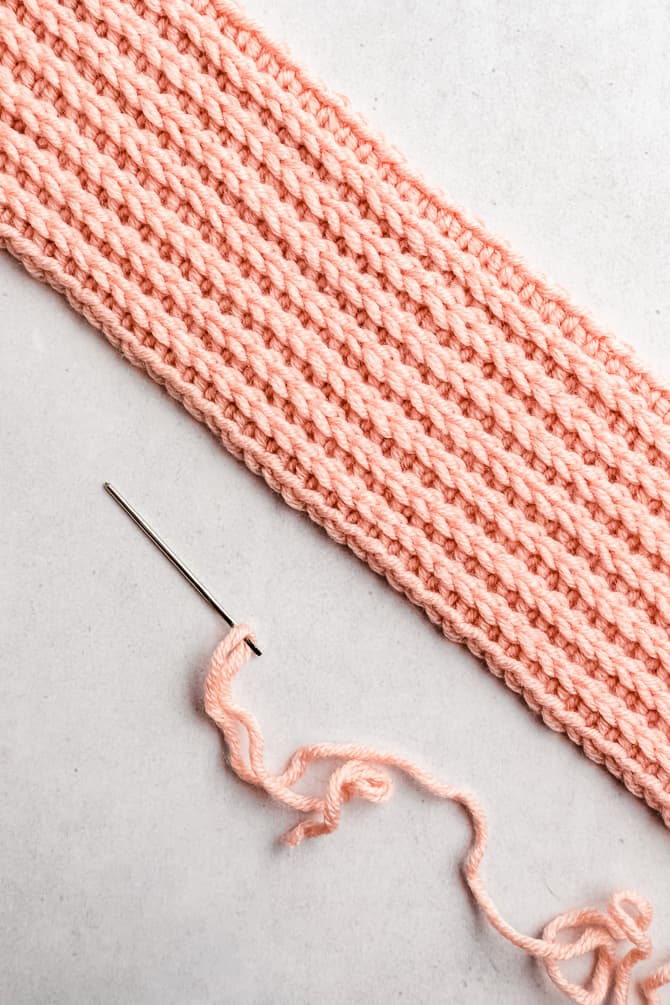
End yarn, and leave a long tail for seaming,
2
Finishing
Lay the headband horizontally with the “right side” facing up. Fold the headband in half lengthwise, right sides together.
Hold each of the two short folded sides, one in each hand. Bring the two short, folded sides up to meet one another.

Insert one folded side into the other, overlapping the folded halves. See the photo above. Think of the two ends and two interlocking “C” shapes.
3
To Seam:
You should have 4 layers to stitch through. With a tapestry needle and the yarn tail, sew the edges together. The seam will be hidden inside the twist.
Weave in loose ends and turn the headband right-side out.
You may sell finished items made from this pattern, but please reference this post and link to my website: sarahmaker.com.
More Crochet Patterns
If you like to crochet, you may be interested in these related posts.
- Easy Crochet Hair Scrunchie – A Free Beginner Pattern
- Easy Crochet Hat Pattern – Chunky Ribbed Beanie
- How to Crochet a Scarf for Beginners – Free Pattern
- How to Crochet a Bandana + Free Easy Pattern
- How to Crochet a Blanket + Free Pattern
- Easy Crochet Bucket Hat Pattern
What’s Next?
Pin this post: Save this tutorial to your Pinterest boards so that you can come back to it later.
Leave a comment: We love to hear your feedback. Tell me in the comments below!
Share on Instagram or Facebook: When you make this project, share it on social media and tag me @sarahmaker_. We love to see what you make!
Twist-Front Crochet Ear Warmer
A super cozy headband design with a knitted look and a front twist.
Materials
- Lion Brand Color Made Easy yarn, or another bulky weight yarn (category 5)
Tools
- Size K/10.5 (6.5 mm) crochet hook
- a blunt-tipped tapestry needle to sew the seam
- stitch markers, if desired
- ruler or tape measure, if desired
Instructions
- Row 1: Ch 64 (or the number of chains determined in the size chart above). Sc in 2nd ch from hook, 1 sc in each ch across. Ch 1 and turn. (63)
- Row 2: Sl st blo in each st across. Ch 1 and turn. (63)
- Row 3: Sc blo in each st across. Ch 1 and turn. (63)
- Repeat, alternating Rows 2 and 3 for a total of 15 rows, ending on a sc row, or until the headband measures 4” in width.
- End yarn, and leave a long tail for seaming,
Finishing
- Lie the band horizontally with the “right side” facing up. Fold the band in half lengthwise, right sides together.
- Bring the two short, folded sides up to meet one another. Insert one edge into the other, overlapping the sides.
- Seam through all 4 layers with a tapestry needle and the yarn tail. Weave in loose ends and turn the headband right-side out.


Similar Posts
Free Crochet Ripple Baby Blanket Pattern
27 Free Crochet Plant, Cactus, and Succulent Patterns
25+ Free Granny Square Bags Patterns
50 Free Crochet Tank and Crop Top Patterns
27 Free Crochet Rug Patterns
How to Half Double Crochet Stitch (HDC)